Fading and weak contrast
Old prints often lose contrast or take on a yellow, red, or blue cast. Restoration can rebalance the tones and make faces, clothing, and the background easier to see without turning the picture into a modern filter.
Start with the photo, not a long setup form. Choose a file or sample, review the first result, and decide what to do next from evidence you can see.
Upload a JPG, PNG, or WEBP up to 10 MB. A clear, uncropped scan gives the restoration more useful detail to work with.
Sign in with Google for 3 starter credits. Use the first result to judge the faces, repaired damage, contrast, and color treatment.
Starter-credit results include a small watermark. Paid credits or Pro remove it from photos you choose to keep.
Automatic restoration works best when the important people and objects are still visible. It can clean up common age damage and make a scan easier to view, but it cannot recover facts that are completely missing from the source.
Old prints often lose contrast or take on a yellow, red, or blue cast. Restoration can rebalance the tones and make faces, clothing, and the background easier to see without turning the picture into a modern filter.
Small scratches, dust spots, crease lines, and worn paper edges are good candidates for automatic repair. Check repaired boundaries closely, especially where damage crosses an eye, hand, patterned fabric, or written detail.
A clearer scan can recover contrast and edge detail in a soft portrait. It cannot reveal information that was never captured, so tiny faces and severe motion blur may still look uncertain after enhancement.
Colorization can make a family photo easier to relate to, but the colors are estimated. Treat the result as a visual interpretation and keep the original black-and-white scan as the historical record.
These illustrated samples demonstrate the kinds of changes the tool can make. They are examples, not a promise that every damaged photo will produce the same level of detail.
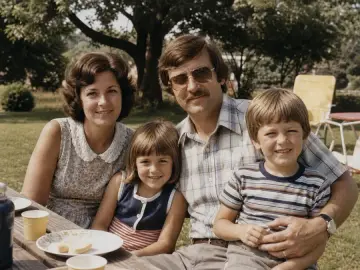
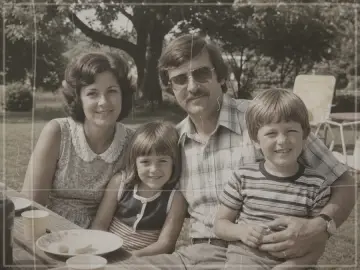
This illustrated example shows stronger contrast and clearer faces while keeping the composition and outdoor setting recognizable.
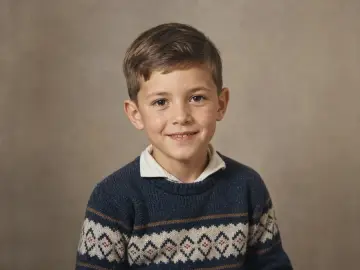
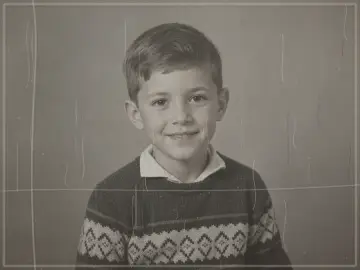
This illustrated example shows scratches, fold marks, and dust reduced without deliberately restyling the portrait.
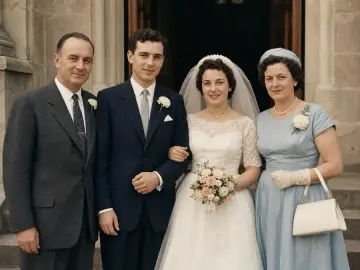
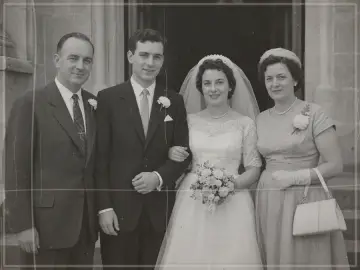
This illustrated example shows one restrained color interpretation. The original scan remains the historical reference.
Source quality matters more than any setting. A careful scan gives the tool more real information and lowers the chance that it fills damaged areas with details that were never in the photograph.
A fresh scan usually contains more detail than a screenshot, compressed message attachment, or photo copied from social media. If someone else has the print, ask for the highest-quality scan they can send.
If you do not have a scanner, place the print flat and use soft, even light. Avoid flash glare, window reflections, deep shadows, and a steep camera angle that changes the shape of the photo.
Include the outer edges, borders, and damaged areas. Cropping too early removes context the restoration needs and can cut off clothing, hands, dates, or notes that matter to the family.
Keep the original scan before repairing, colorizing, or enlarging it. A restored version is useful for viewing and printing, while the untouched file remains the most reliable record of what the print contained.
A whole album rarely has one kind of damage. Test a faded color print, a scratched black-and-white portrait, and a group photo with small faces before using more credits. That mix shows where automatic restoration is reliable and where a better scan or human retoucher may save time.
Start with one representative scan, compare the faces and small details, then decide whether the same restoration approach suits the rest of the album.
Make faint portraits, uniforms, rooms, and written context easier to inspect while keeping the untouched scan beside the restored version.
Prepare a gentler, clearer version for a frame, service program, or private keepsake, then ask a relative to confirm the face still feels right.
Test the preview at the size you plan to print before preparing a birthday, anniversary, reunion, or framed family gift.
A restoration can look impressive and still be wrong. Compare it with the original at full size, ask someone who knows the person when possible, and stop if the tool has replaced damage with a different face, object, uniform, or background.
Compare eyes, mouth, face shape, pose, clothing, and age. A cleaner result is only useful if it still feels like the same person.
Look at scratches, folds, stains, paper texture, and background edges. Softening everything can look clean but lose important detail.
Uniforms, rooms, cars, furniture, and fabric should not look modernized. Keep the untouched scan for family records.
A preview that looks fine on a phone may not hold up as a large print. Zoom in and check the result at the size you need before paying for an export.
If a face or object is missing, treat the result as an interpretation. High-stakes archives still need a human retoucher or a better scan.
Sign in with Google to start with 3 starter credits. If the result is useful, save your work or choose a paid watermark-free export.
Yes. Sign in with Google and your new account gets free starter credits, no card required. Starter-credit results include a small watermark; paid credits or Pro give a watermark-free export.
It can reduce fading, weak contrast, scratches, dust, fold marks, grain, and mild blur. It can also colorize a black-and-white photo. Missing faces or large torn areas may be invented rather than recovered, so those cases need extra review.
Upload a JPG, PNG, or WEBP file up to 10 MB. HEIC is not accepted, so export an iPhone photo as JPG before uploading it.
It can. AI may invent detail when a face is tiny, blurry, or badly damaged. Compare the eyes, mouth, face shape, age, clothing, and background with the original, and do not keep a result that changes the person.
Yes, but the colors are an interpretation. The tool aims for restrained, period-aware tones, yet it cannot know the original color of every dress, wall, uniform, or object. Keep the untouched scan with your family records.
From October 10, 2026 (UTC), free image results are kept for 30 days; earlier free results will not be removed before November 9, 2026 (UTC). Download a copy before expiry. Paid results and animation clips keep their existing account-history policy. Source uploads are retained as needed for the related result and support. Separately, deletion requests are processed within 30 days. See the privacy policy for details.
Explore related pages
Start with the general workflow, understand what the free starter credits include, or focus on scratches, folds, stains, and torn areas.